How to add cross-platform multi-threading to Unity WebGL and Standalone -- with (mostly) C#! Part 2
Intro
Part 2 of a multi-part series!
- Part 1 🔗: Initial C# -> JS interop implementation
- Part 2 🔗: Cross-platform implementation
- Part 3 🔗: Simplifying JS interop with Comlink
First, be sure to read part 1 🔗! Aside from covering all the details of why and how, we’ll be modifying the code from that post. To keep this post simple, we won’t really be reviewing any of the prior work.
Additionally, the version of the code used is here: https://github.com/Timiz0r/WebGLMultiThreaded/tree/crossplat 🔗 It contains a decent summary of all the code and doesn’t require any prior reading.
Goal
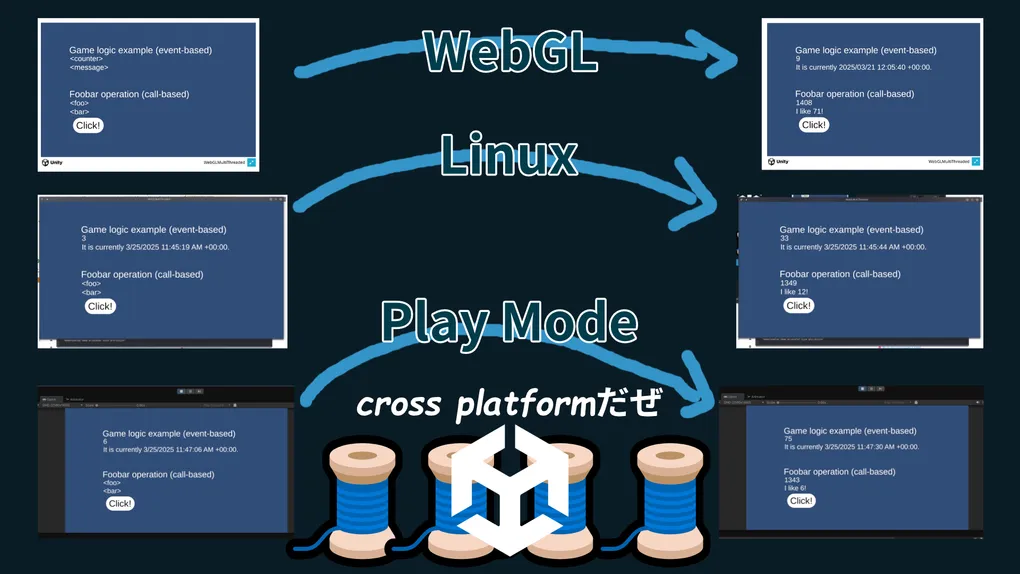
The goal will be to make our Unity project work on both Standalone Windows/Mac/Linux, as well as WebGL. Additionally…
- The
GameLogicandFoobaroperation code will have no Unity dependencies (for WASM-build reasons) - Our scenes — and therefore components used in the scene — are platform agnostic.
- Our platform-agnostic components ideally don’t use conditional compilation via
#if #endif— not that there’s anything wrong with that, necessarily. - Our platform-agnostic components should be able to run stuff on the main thread without any manual work.
- Our
GameLogic.Updatedoes not expect to be run in parallel.
Platform-agnostic components
Both our FoobarComponent and WebGLGameLogic contain the WebGL implementation details.
We’ll want to move them out to make them platform-agnostic.
Platform-agnostic FoobarComponent
First, we’ll rename FoobarComponent to OperationRunner in order to free up the name
while keeping the implementation details for later.
The (replacement) FoobarComponent will look something like this:
using TMPro;
using UnityEngine;
using WebGLMultiThreaded;

public class FoobarComponent : MonoBehaviour
{
    private static readonly System.Random rng = new();

    async Awaitable OnMouseDown()
    {
        FoobarResult result = await OperationRunner.FoobarAsync(rng.Next(100));

        Transform foobar = transform.parent;

        if (foobar?.Find("Foo") is Transform foo)
        {
            foo.GetComponent<TextMeshPro>().text = result.Foo.ToString();
        }

        if (foobar?.Find("Bar") is Transform bar)
        {
            bar.GetComponent<TextMeshPro>().text = result.Bar;
        }
    }
}
The key thing to note is OperationRunner.FoobarAsync.
We haven’t implemented yet, but each platform we implement will need to provide it.
Otherwise, it should look pretty similar to the original!
Platform-agnostic SceneGameLogicRunner
Our platform-agnostic SceneGameLogicRunner:
using TMPro;
using UnityEngine;
using WebGLMultiThreaded;

public class SceneGameLogicRunner : MonoBehaviour
{
    // in this example, this one component is the central place handling events and manipulating the scene.
    // one alternative is adding and invoking unity events from here
    private void StateChanged(StateChange stateChange)
    {
        switch (stateChange.Target)
        {
            case "Counter":
            {
                var obj = transform.Find("Counter");
                obj.GetComponent<TextMeshPro>().text = stateChange.As<int>().NewValue.ToString();
                break;
            }

            case "Message":
            {
                var obj = transform.Find("Message");
                obj.GetComponent<TextMeshPro>().text = stateChange.As<string>().NewValue;
                break;
            }

            default:
                Debug.LogError($"Unknown state change: {stateChange.Target}");
                break;
        }
    }

    void Start()
    {
        GameLogicInstance.StateChanged += StateChanged;
    }

    void Update()
    {
        GameLogicInstance.Update(Time.time);
    }
}
Similarly to FoobarComponent, we’ll have platform-specific implementations of GameLogicInstance
that we use for updating and receiving state change events.
Implementing platform-specific code
One way is to have #if UNITY_WEBGL and whatnot in our code.
Since this can make code harder to read in the long-term, we’ll avoid it.
Instead, we’ll be adding platform-specific assemblies by adding Assembly Definition assets to platform-specific folders.
This will also require making our GameLogic and Operations folders assemblies, as well, so we’ll do that ahead of time.
Simple create GameLogic and Operations assembly definitions in these folders.
A note on IsExternalInit.cs
This file/class is used to add C# record support.
The easiest way to add IsExternalInit everywhere is to simply copy the file to each assembly
(aka alongside each assembly definition).
WebGL-specific implementation
Let’s rearrange our project a little bit.
Instead of a platform_webgl folder, let’s go with Platform/WebGL and move everything into there.
Furthermore, let’s add a Platform.WebGL assmembly definition that only targets the WebGL platform.
Also, be sure to reference the GameLogic and Operations assemblies we set up just a moment ago.
Also as a quick note on…
Our platform-agnostic components should be able to run stuff on the main thread without any manual work. Our
GameLogic.Updatedoes not expect to be run in parallel.
This is not an issue here, because, when the Web Workers send back messages, they’re picked up off the main thread
(since they are instantiated on the main thread).
Furthermore, since the game logic web worker runs Update synchronously, no other Update can run in the meantime.
WebGL OperationRunner
Assuming you’ve renamed the former FoobarComponent to OperationRunner before making the new FoobarComponent,
we have most of the implementation we need.
Instead of OnMouseDown, we just need a nice public interface.
using System;
using System.Runtime.InteropServices;
using UnityEngine;
using WebGLMultiThreaded;
public static class OperationRunner
{
    private static OperationRequestBuilder<FoobarResult, string> foobarOperation = OperationRequestBuilder.Create(
        success: stateJson => (FoobarResult)JsonUtility.FromJson(stateJson, typeof(FoobarResult)),
        failure: error => error
    );

    public static async Awaitable<FoobarResult> FoobarAsync(int num)
    {
        OperationResponse<FoobarResult, string> response = await foobarOperation.Launch(
            (success, failure, initializing) => OperationRunnerInterop_Foobar(
                num, success: success, failure: failure, initializing: initializing));

        if (!response.IsSuccess)
        {
            throw new Exception($"Failed to run operation: {response.Error}");
        }

        return response.Result;
    }

    [DllImport("__Internal")]
    private static extern void OperationRunnerInterop_Initialize();

    [DllImport("__Internal")]
    private static extern int OperationRunnerInterop_Foobar(
        int num, Action<int, string> success, Action<int, string> failure, Action<int> initializing);

    [RuntimeInitializeOnLoadMethod(RuntimeInitializeLoadType.AfterAssembliesLoaded)]
    private static void Initialize()
    {
        OperationRunnerInterop_Initialize();
    }
}
WebGL GameLogicInstance
We should still have the old WebGLGameLogic.cs file from our original code.
Let’s rename it to GameLogicInstance.cs and reuse most of it!
using System;
using System.Runtime.InteropServices;
using AOT;
using UnityEngine;
using WebGLMultiThreaded;

public static class GameLogicInstance
{
    public static event Action<StateChange> StateChanged;

    public static void Update(float time)
    {
        WebGLGameLogic_Update(time);
    }

    [MonoPInvokeCallback(typeof(Action<string>))]
    private static void StateChangedInternal(string json)
    {
        UntypedStateChange untypedStateChange = (UntypedStateChange)JsonUtility.FromJson(json, typeof(UntypedStateChange));
        StateChange stateChange = untypedStateChange.Target switch {
            "Counter" => untypedStateChange.ConvertTo<int>().NonGeneric(),
            "Message" => untypedStateChange.ConvertTo<string>().NonGeneric(),
            _ => null
        };
        if (stateChange is null)
        {
            Debug.LogError($"Unknown state change: {json}");
            return;
        }
        StateChanged?.Invoke(stateChange);
    }


    [DllImport("__Internal")]
    private static extern void WebGLGameLogic_Initialize(Action<string> eventHandler);

    [DllImport("__Internal")]
    private static extern void WebGLGameLogic_Update(float time);

    [RuntimeInitializeOnLoadMethod(RuntimeInitializeLoadType.AfterAssembliesLoaded)]
    private static void Initialize()
    {
        WebGLGameLogic_Initialize(StateChangedInternal);
    }
}
Redesign GameLogic.StateChanged
Spoiler alert: we’ll want to do this.
What ends up happening is that the “default” implementation of GameLogicInstance doesn’t need
to inspect UntypedStateChange.Target because we don’t need intermediate serialization.
However, WebGL’s implementation does.
Every time we add a new piece of state, we need to modify just WebGL’s implementation, which is quite the smell.
Let’s instead just send the entire before and after states and let subscribers to the event inspect them for changes.
Our state-related code will now look something like this:
    [Serializable]
    public class State
    {
        // fields for JsonUtility reasons. also consider System.Text.Json or Newtonsoft.Json.
        public int Counter;
        public string Message;

        public State Clone() => new() { Counter = Counter, Message = Message };
    }

    [Serializable]
    public class StateChange
    {
        // fields for JsonUtility reasons. also consider System.Text.Json or Newtonsoft.Json.
        public State Old;
        public State New;
        public bool HasChanged<T>(Func<State, T> selector, out (T oldValue, T newValue) values)
        {
            values = (selector(Old), selector(New));

            // we do this check (for reference types) as a special case of the below check
            if (values.oldValue == null && values.newValue == null) return true;
            if (values.oldValue?.Equals(values.newValue) != true) return false;

            return true;
        }
    }
And our GameLogic like this:
    public class GameLogic
    {
        private const float TimePerTick = 1;
        private float nextTime = 0;
        private State state = new();

        public event Action<StateChange> StateChanged;

        public void Update(float time)
        {
            if (time < nextTime) return;
            nextTime = time + TimePerTick;

            State old = state.Clone();
            bool changed = false;

            //some expensive operation
            Thread.Sleep(500);

            state.Counter += 3;
            state.Message = $"It is currently {DateTimeOffset.UtcNow}.";
            changed = true;

            // always true in this case, but here for demonstration purposes
            if (changed) StateChanged?.Invoke(new StateChange() { Old = old, New = state });
        }
    }
Let’s not forget our WASM serialization code!
[JsonSerializable(typeof(FoobarResult))]
[JsonSerializable(typeof(StateChange))]
[JsonSerializable(typeof(State))]
// ...
And it’s caller:
Instance.StateChanged += stateChange => StateChanged(InteropSerialization.Serialize(stateChange));Most importantly, our WebGL GameLogicInstance.StateChangedInternal looks much simpler:
    [MonoPInvokeCallback(typeof(Action<string>))]
    private static void StateChangedInternal(string json)
    {
        StateChange stateChange = (StateChange)JsonUtility.FromJson(json, typeof(StateChange));
        StateChanged?.Invoke(stateChange);
    }
As does SceneGameLogicRunner:
    private void StateChanged(StateChange stateChange)
    {
        transform.Find("Counter").GetComponent<TextMeshPro>().text = stateChange.New.Counter.ToString();
        transform.Find("Message").GetComponent<TextMeshPro>().text = stateChange.New.Message;
    }
Default/Standalone-specific components
As a quick-note, I’m calling them “default” because they could hypothetically be the implementation for non-Standalone platforms — not just Windows/Mac/Linux.
We’ll start with the default implementations because they should be pretty simple.
Put them in Platform/Default, and be sure to add an assembly definition that targets all platforms except WebGL,
as well as references GameLogic and Operations.
Default OperationRunner
Crazy simple, since Awaitable gives is a simple way to switch to a background thread:
using UnityEngine;
using WebGLMultiThreaded;
public static class OperationRunner
{
    public static async Awaitable<FoobarResult> FoobarAsync(int num)
    {
        await Awaitable.BackgroundThreadAsync();
        FoobarResult result = Foobar.Execute(num);
        // if caller is main thread, will await over there will get us back to main thread
        return result;
    }
}
Default GameLogicInstance
This one ends up being a bit more complicated. First, the code:
using System;
using System.Threading;
using UnityEngine;
using WebGLMultiThreaded;

public static class GameLogicInstance
{
    private static SynchronizationContext mainThread;
    private static int updateInProgress = 0;
    private static readonly GameLogic gameLogic = new();

    public static event Action<StateChange> StateChanged;

    public static void Update(float time)
    {
        if (updateInProgress == 1) return;
        // aka if the original value is 1, then another Update got ahead of this invocation
        if (Interlocked.CompareExchange(ref updateInProgress, 1, 0) == 1) return;

        ThreadPool.QueueUserWorkItem(_ =>
        {
            try
            {
                gameLogic.Update(time);
            }
            finally
            {
                updateInProgress = 0;
            }
        });
    }

    // NOTE: this, to me, suprisingly-ish works.
    // rather, I would expect it to *not* work if there's no code that yields any time in the main thread.
    //
    // if this implementation isn't working in your case, this would be a solution easier to reason about:
    // 1. store all event data in a thread-safe way (SemaphoreSlim or immutable collections [or thread-safe collections])
    // 2. Have SceneGameLogicRunner.(Late)Update invoke a GameLogicInstance.SendEvents (in a thread-safe way)
    private static void StateChangedInternal(StateChange stateChange)
        => mainThread.Post(_ => StateChanged?.Invoke(stateChange), null);

    [RuntimeInitializeOnLoadMethod(RuntimeInitializeLoadType.AfterAssembliesLoaded)]
    private static void Initialize()
    {
        mainThread = SynchronizationContext.Current;
        gameLogic.StateChanged += StateChangedInternal;
    }
}
To satisfy…
Our
GameLogic.Updatedoes not expect to be run in parallel. We implement a simple, non-blocking lock withInterlocked.CompareExchange.
To satisfy…
Our platform-agnostic components should be able to run stuff on the main thread without any manual work. We store
SynchronizationContext.Current(Initializegets invoked off the main thread) and raiseStateChangedthrough it.
Conclusion
We now have three+ ways to run the code!
- Play Mode now works!
- Windows, Mac, and Linux builds
- WebGL builds
I didn’t have a cross-platform design in mind when I wrote the original code, so I skipped that part for later. I didn’t expect to have a working crossplat implementation done in 3 hours; otherwise, I would have done it the first time around.
With cross-platform support in, we can finally see the potential value-add of this technique, despite the pain points in implementation. Once all the WebGL plumbing is in place, we can very quickly and easily create a multi-threaded game on it and other platforms.